Unreal Engine Retroreflection Shading Model
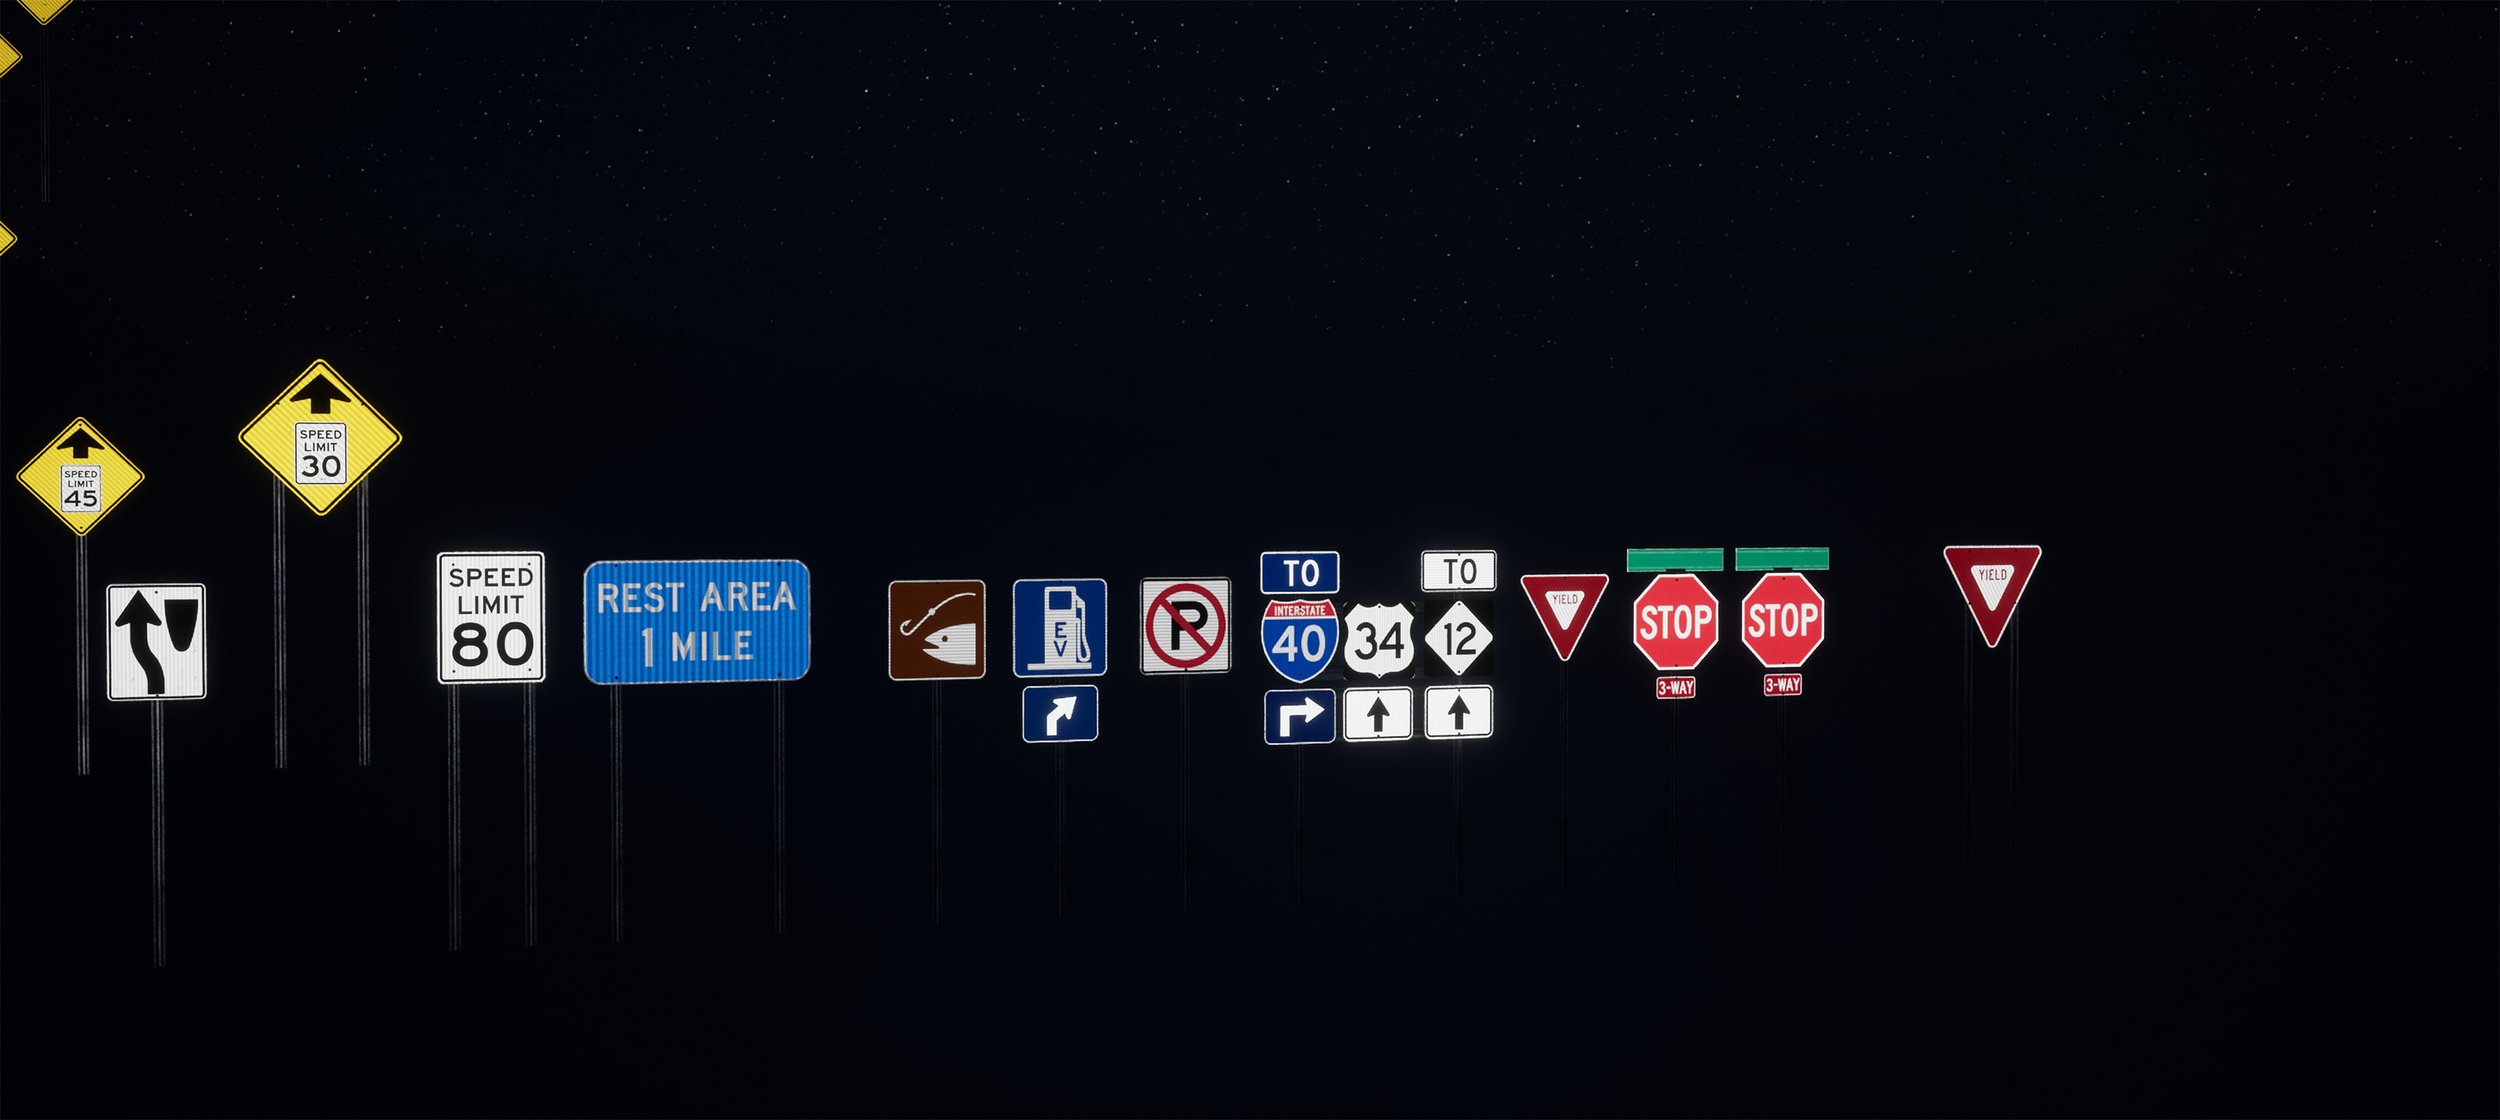
This is my retroreflection shading model I wrote for Unreal Engine 4 after I made my first road sign meshes. I was inspired after seeing the effect while out driving at night and began research. I found someone else had made something similar but it was lacking in the features that I wanted. I started by researching how retroreflections work
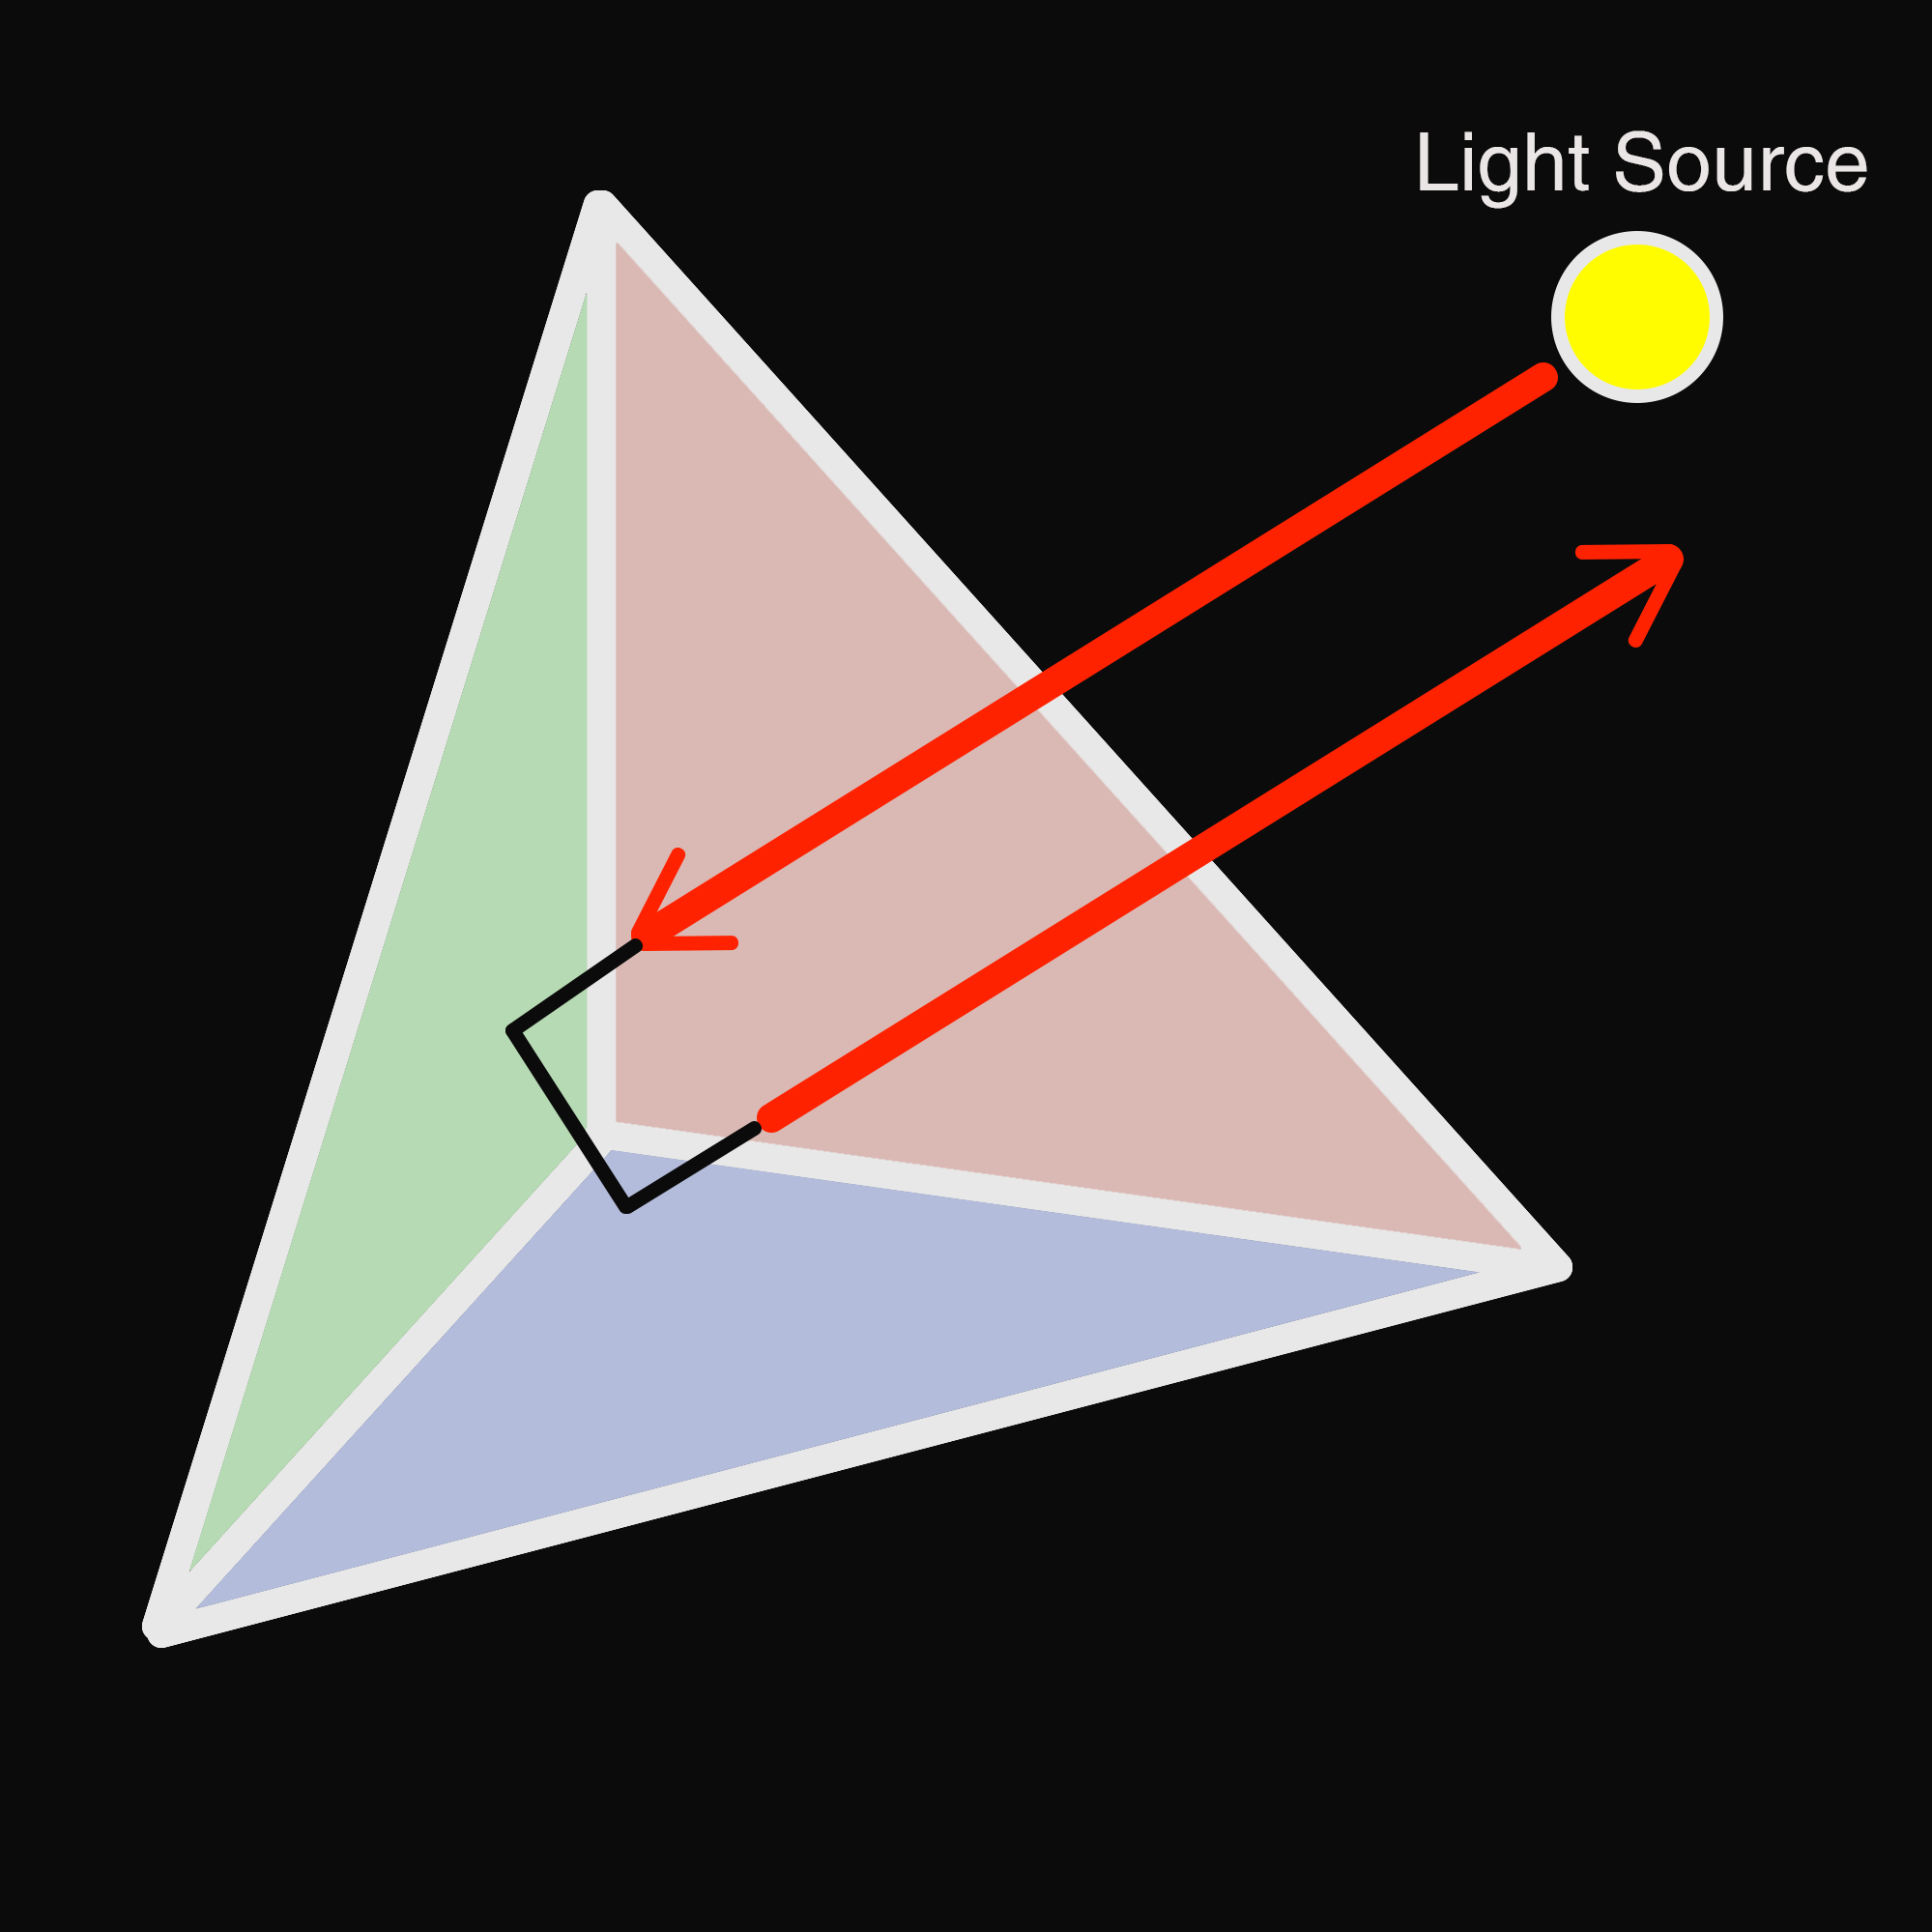
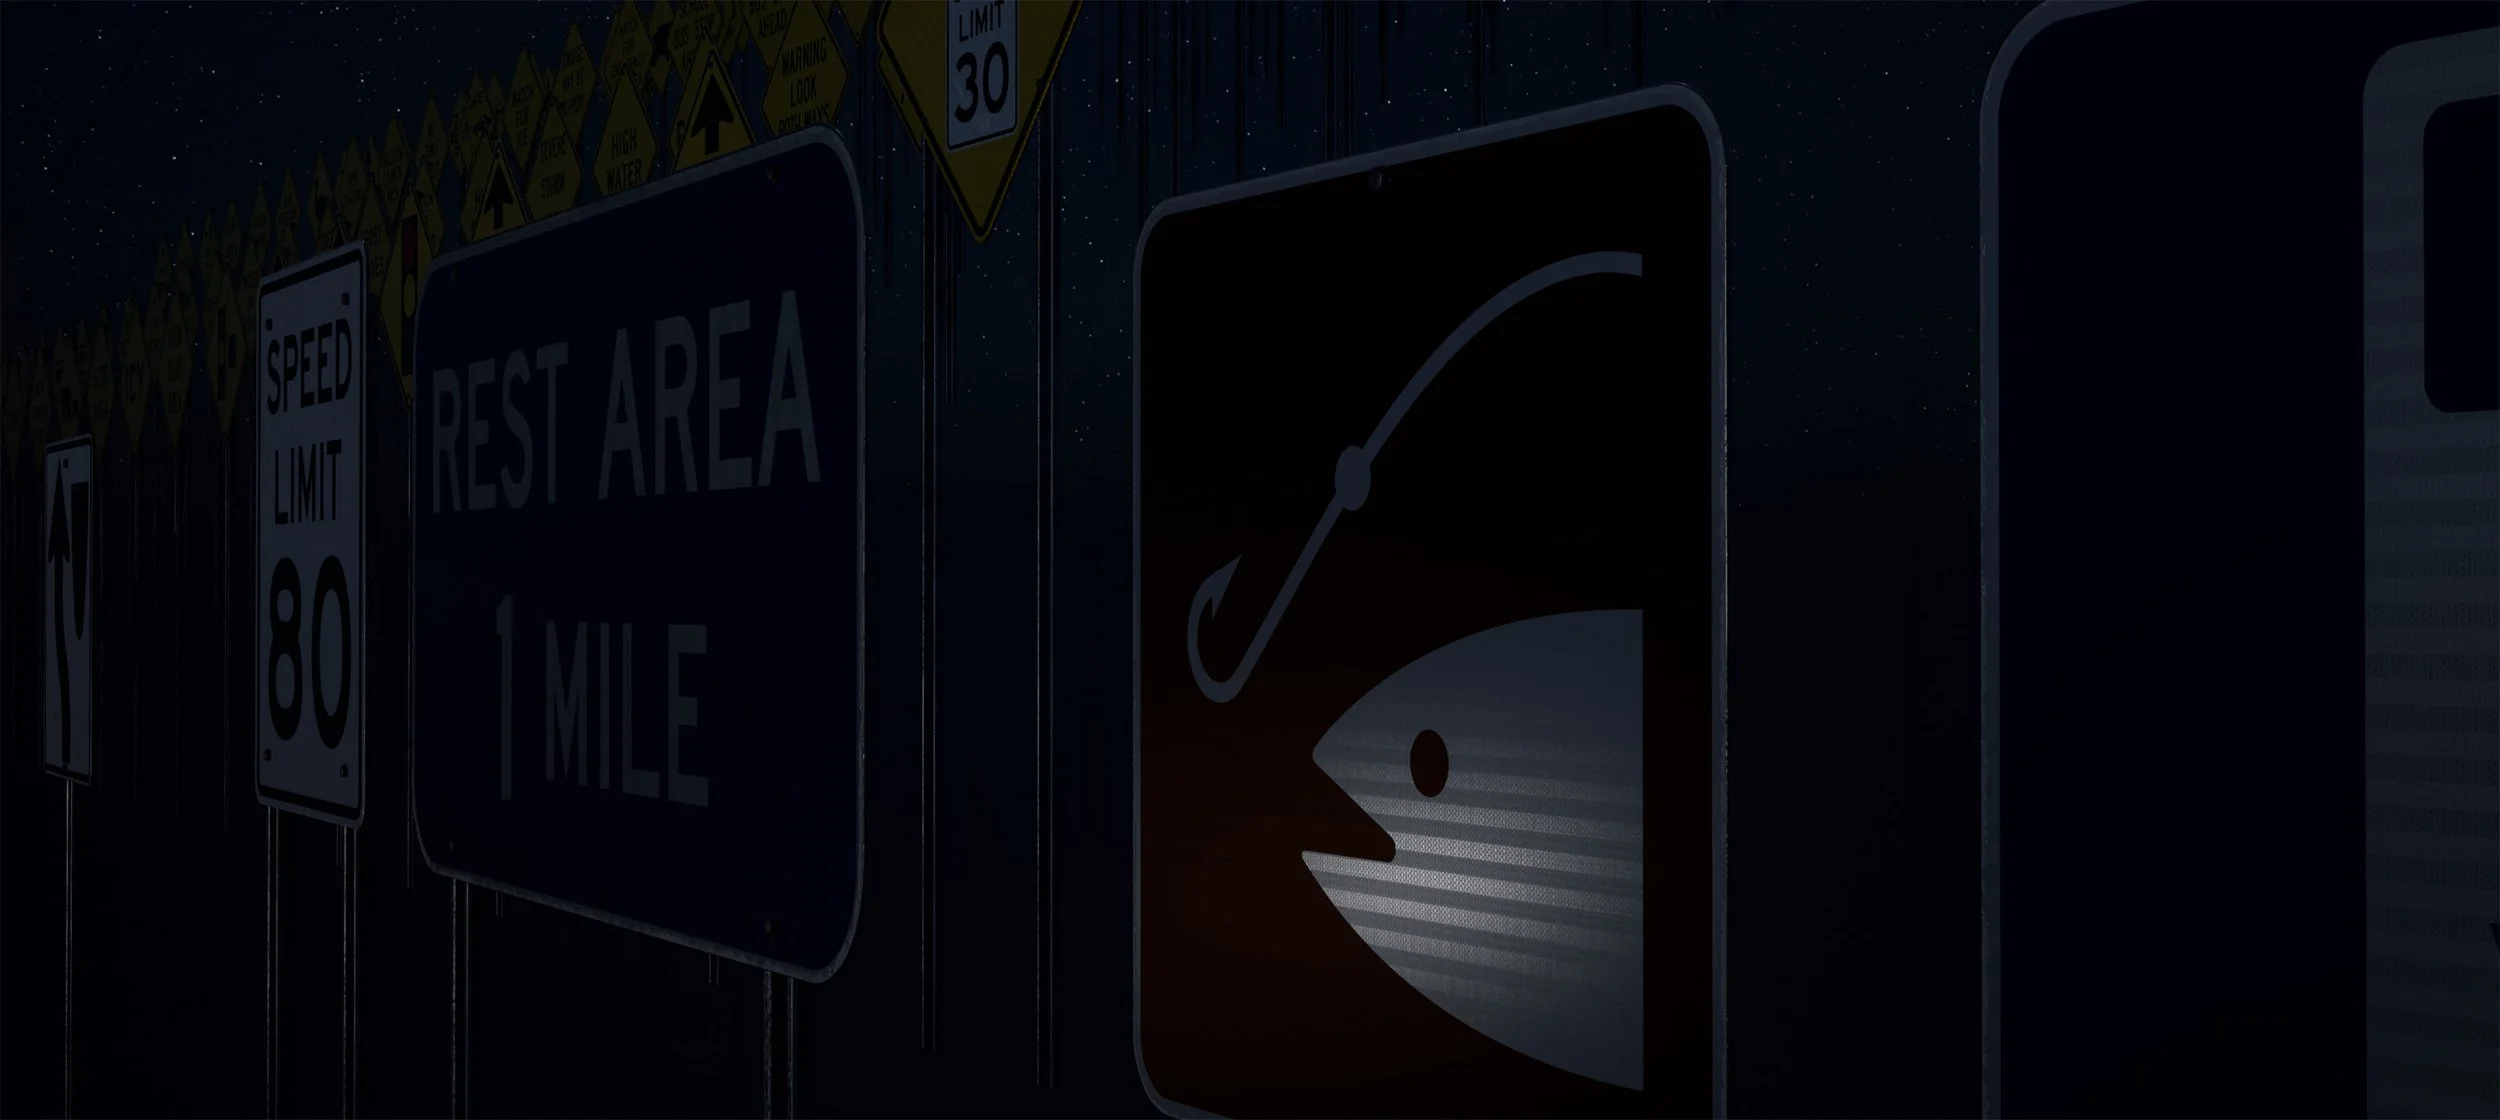
In simple terms, retroreflections work by using a glass sphere or prism to bounce the light almost directly back towards the source. This is used on many different materials from road signs to ‘hi vis’ vests for cyclists, construction workers, etc. to aid night time visibility.
Once I had the basics down, I began working on a shader prototype. This part was relatively easy, as I simply needed to create a second specular term, then use a dot product of the light vector and view vector to position the new specular lobe correctly. This worked quite well for what i was looking to do, after which I only had to plug it into a lerp to switch between the standard specular lobe and the combo standard + retroreflective lobe using a mask texture input. This way we can mask out any parts of the material that we don’t want to be retroreflective.

With the mask setup working, next I wanted to add a few creature comforts, starting with a camera depth fade. This way the retroreflection has a nice falloff based on the camera distance from the object itself. For this I had to get the distance of the world position and the reflection vector. I then divide this by a custom input value to control the fade offset and pass it through to the shading model itself.


After ensuring that camera depth fade works correctly, I added an extended falloff to the specular lobe itself for finer control over how the retroreflection fades at a distance and shallow angles.

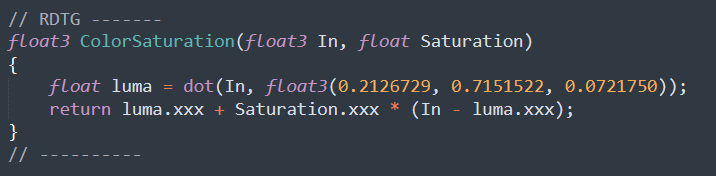
From here I added a color saturation function I could run the specular color through for the retroreflection, thus boosting the saturation of only the retroreflection specular lobe and giving a more realistic appearance in certain scenarios.

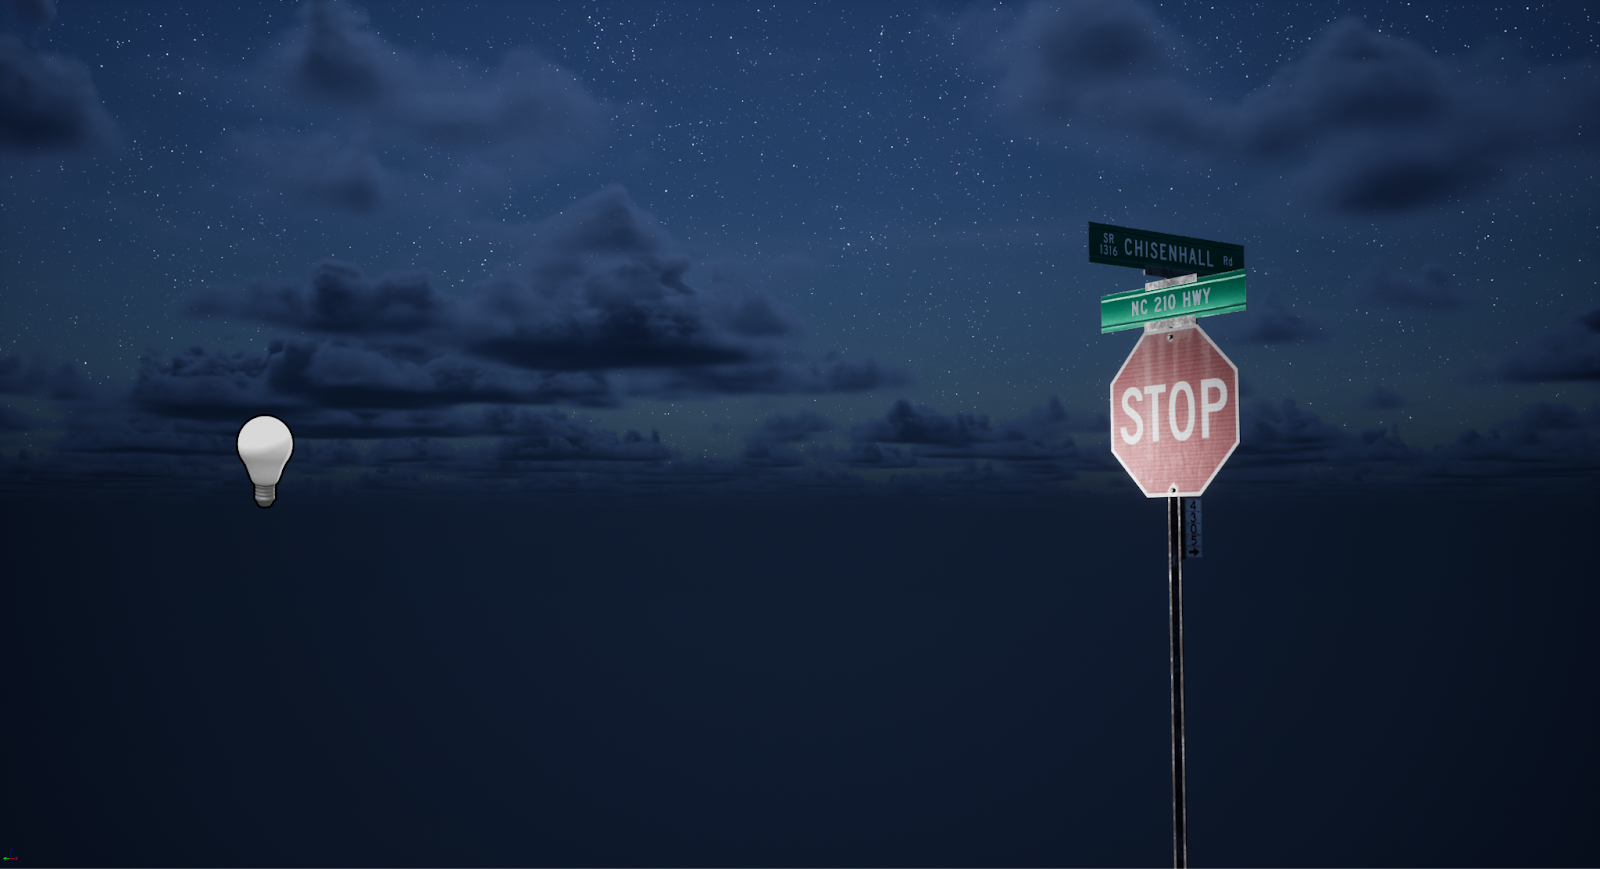
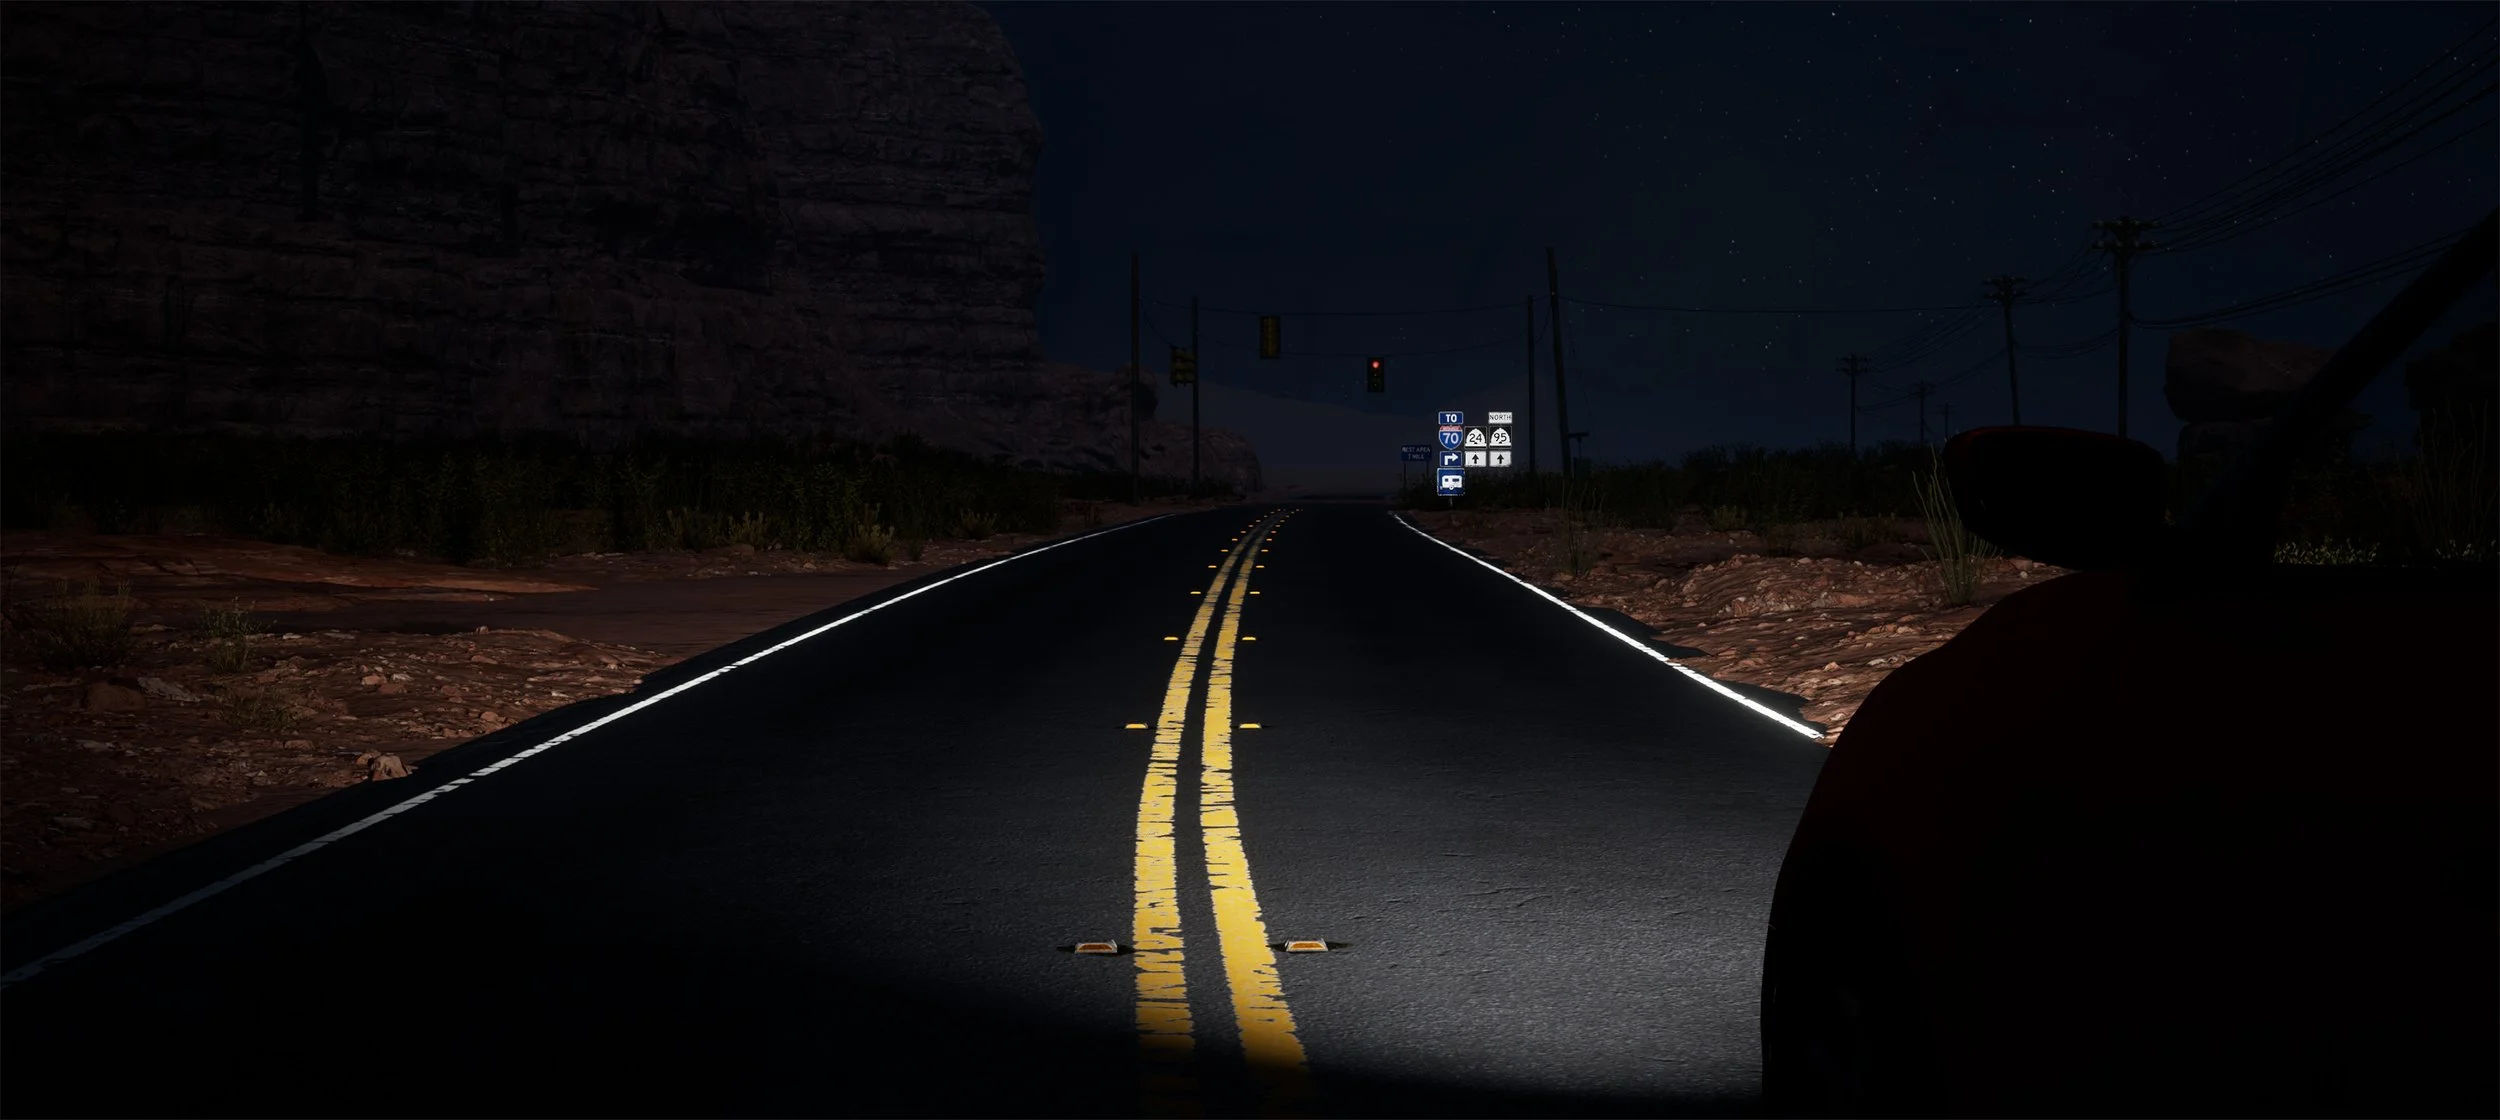
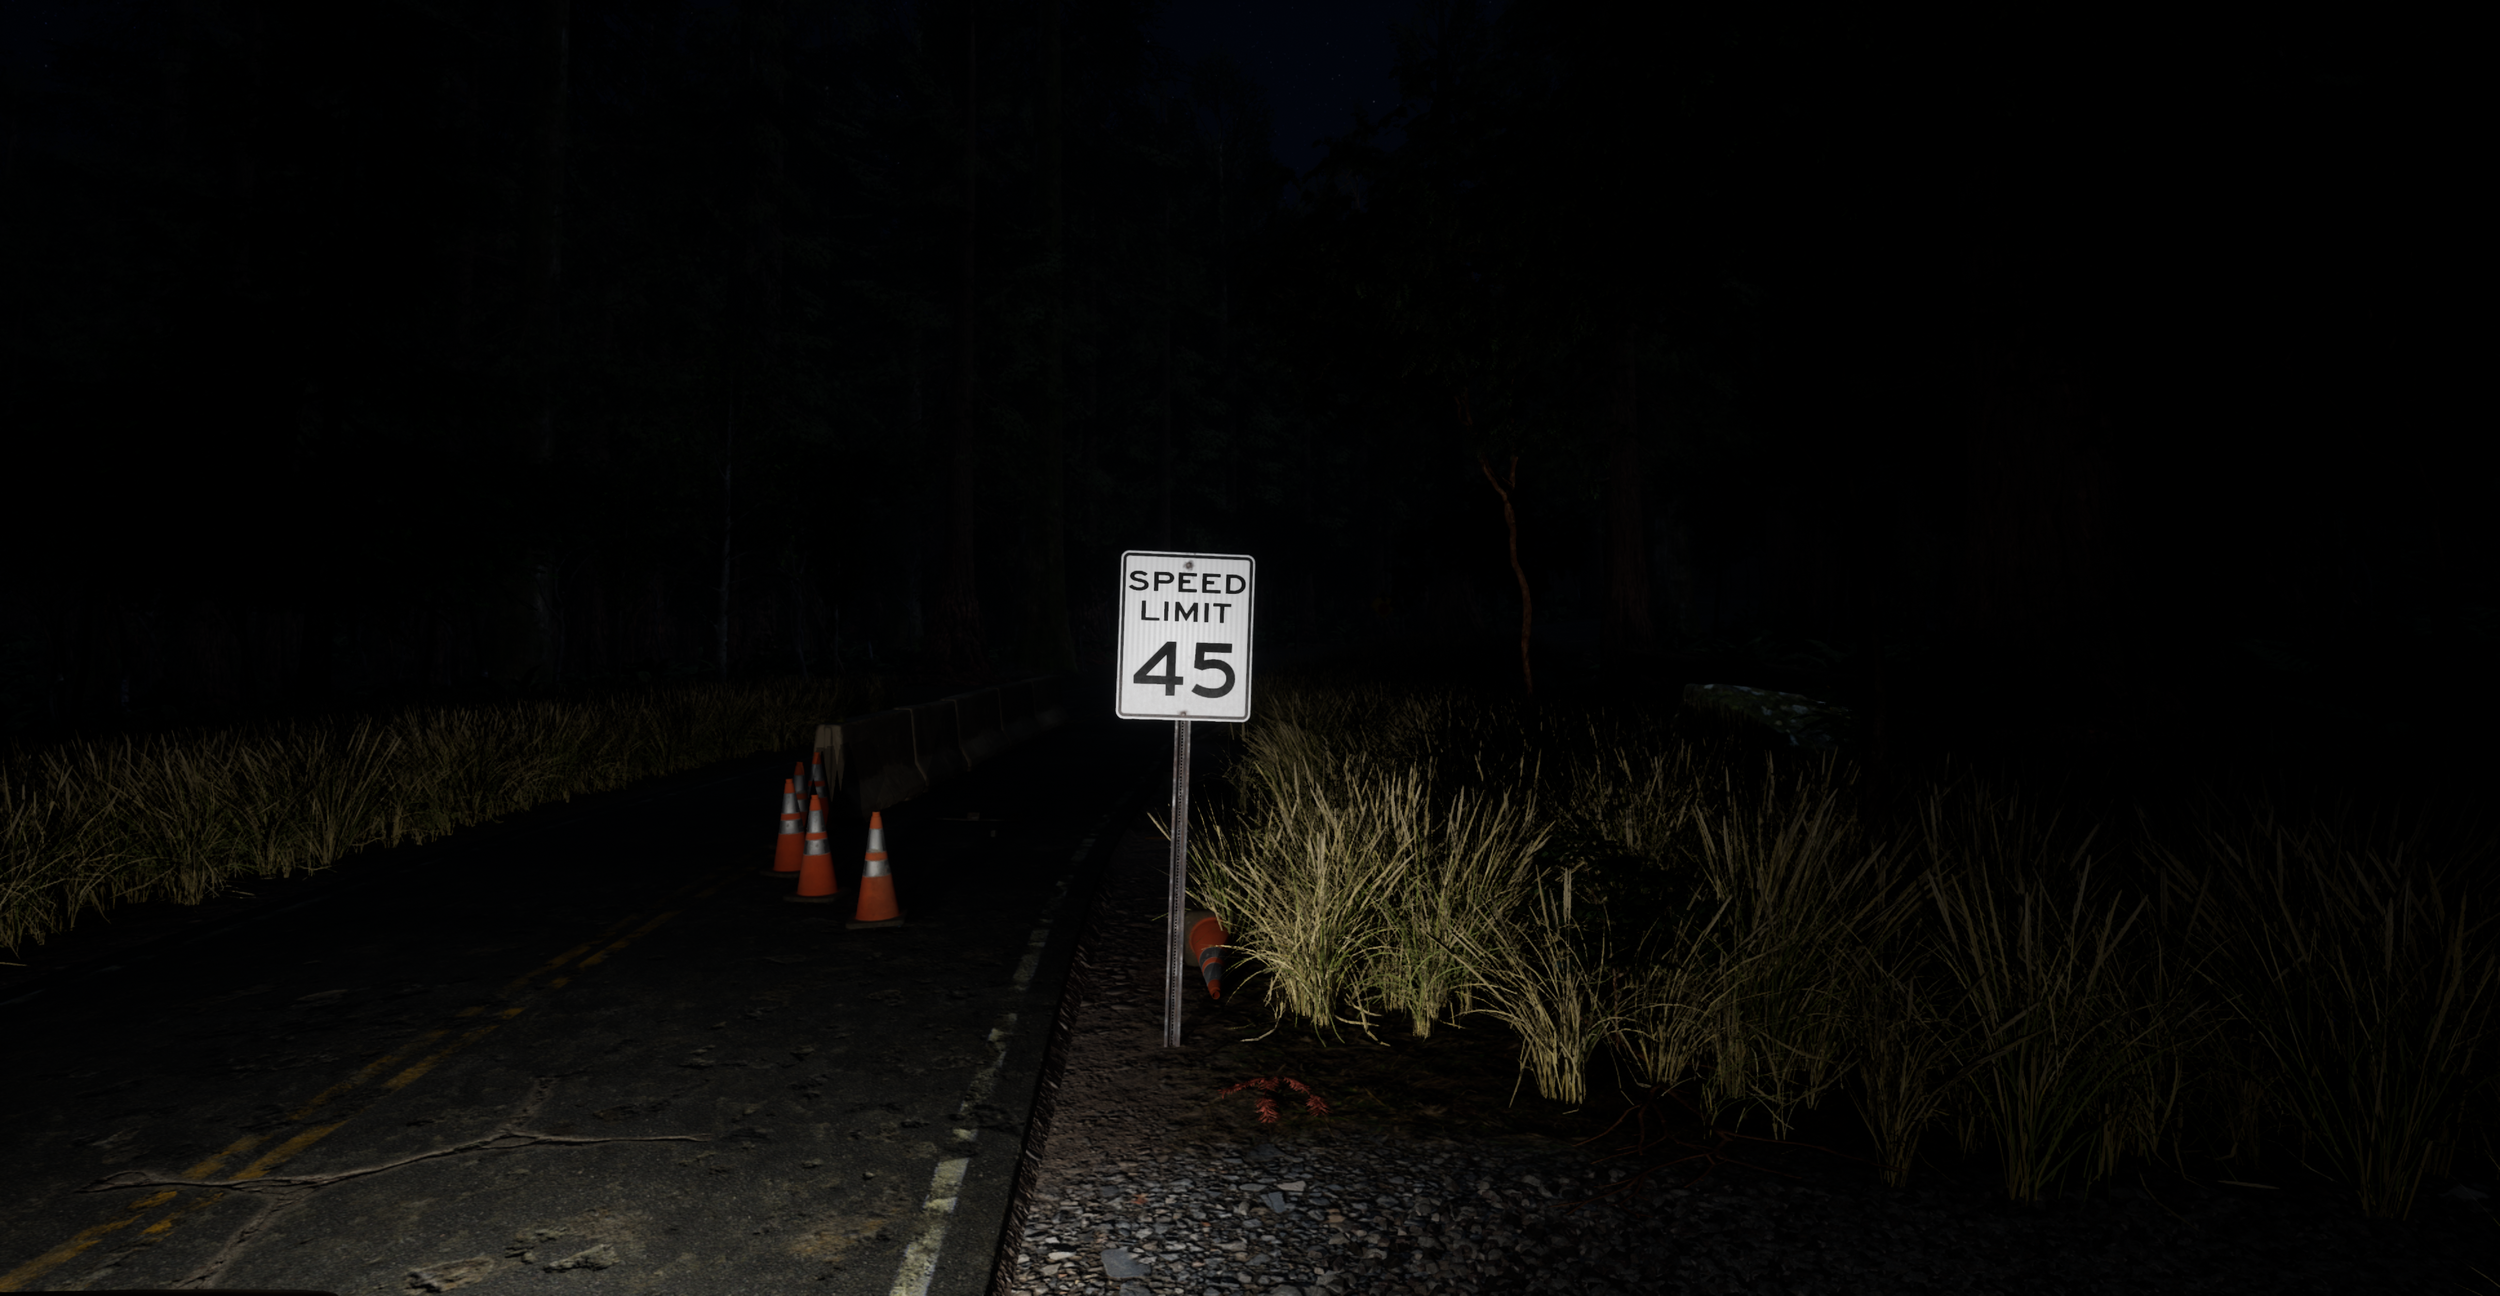
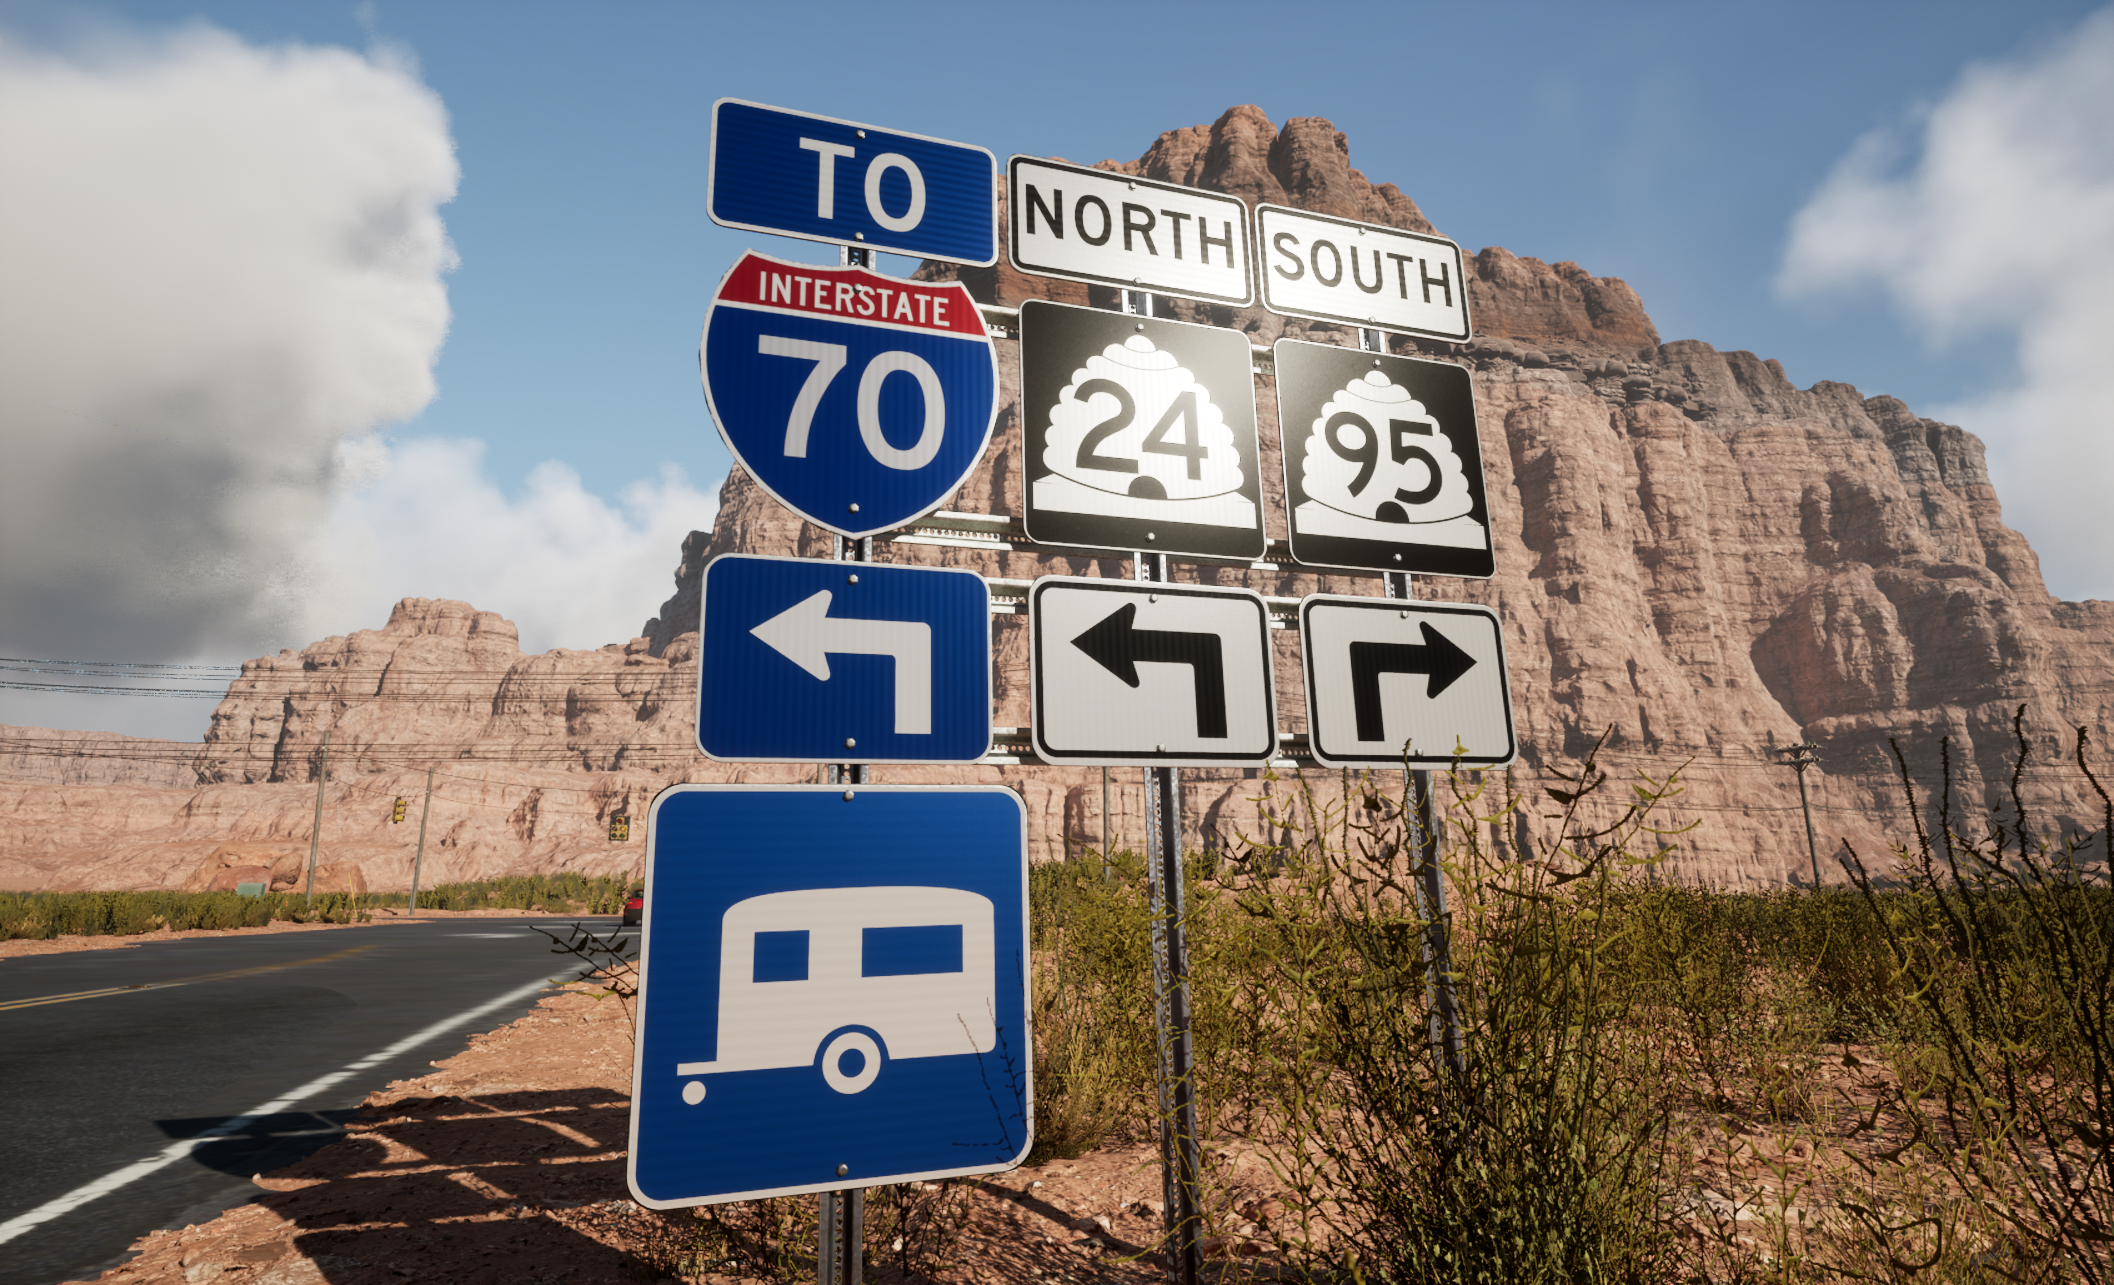
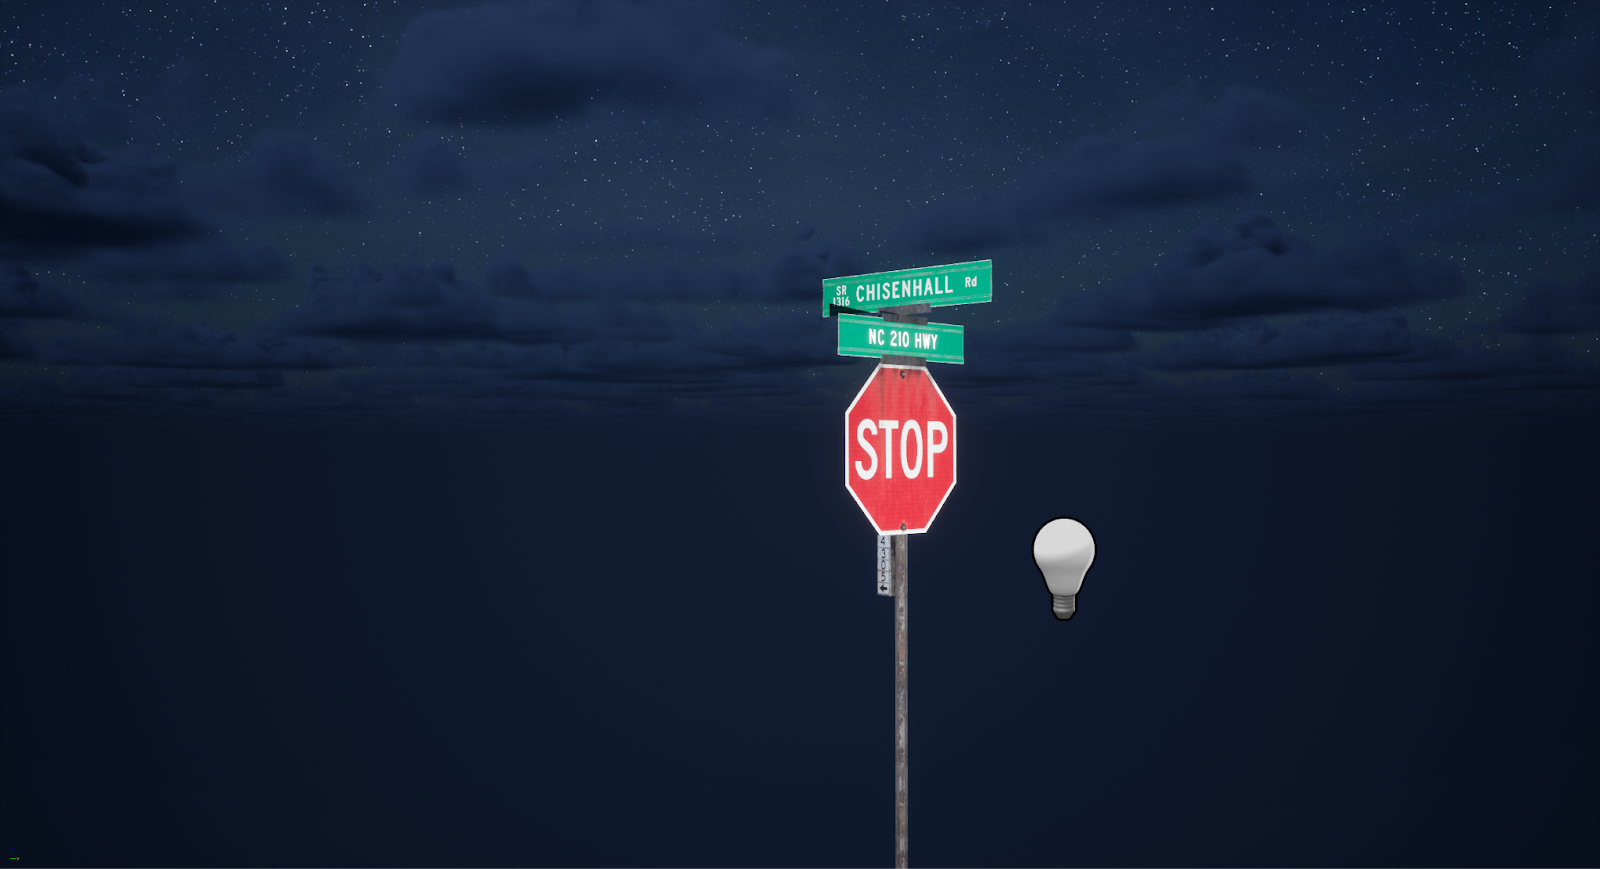
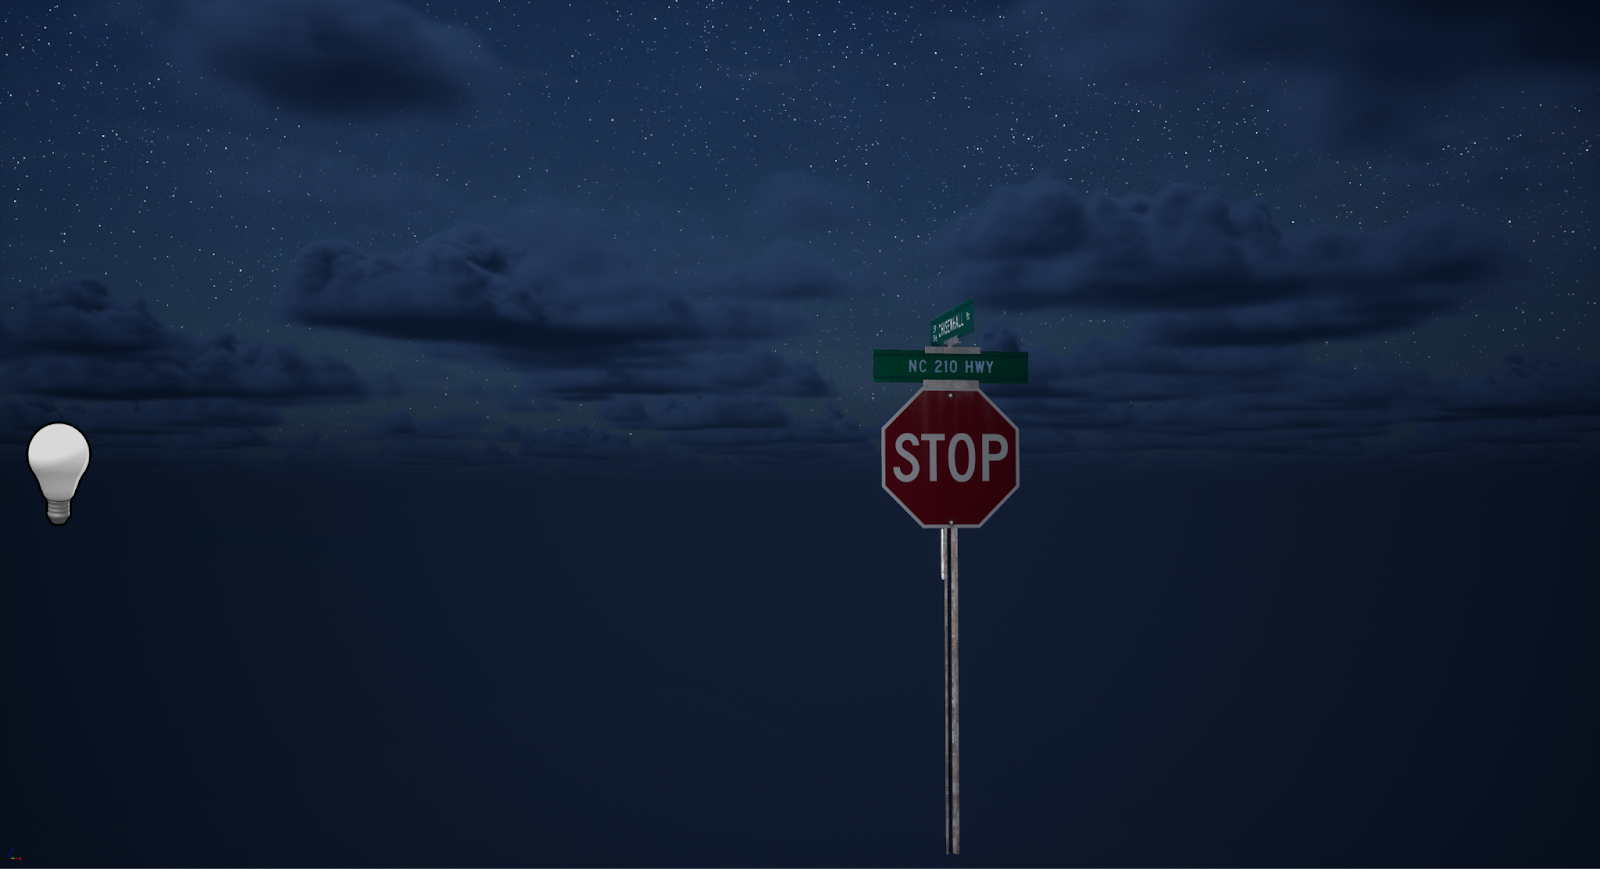
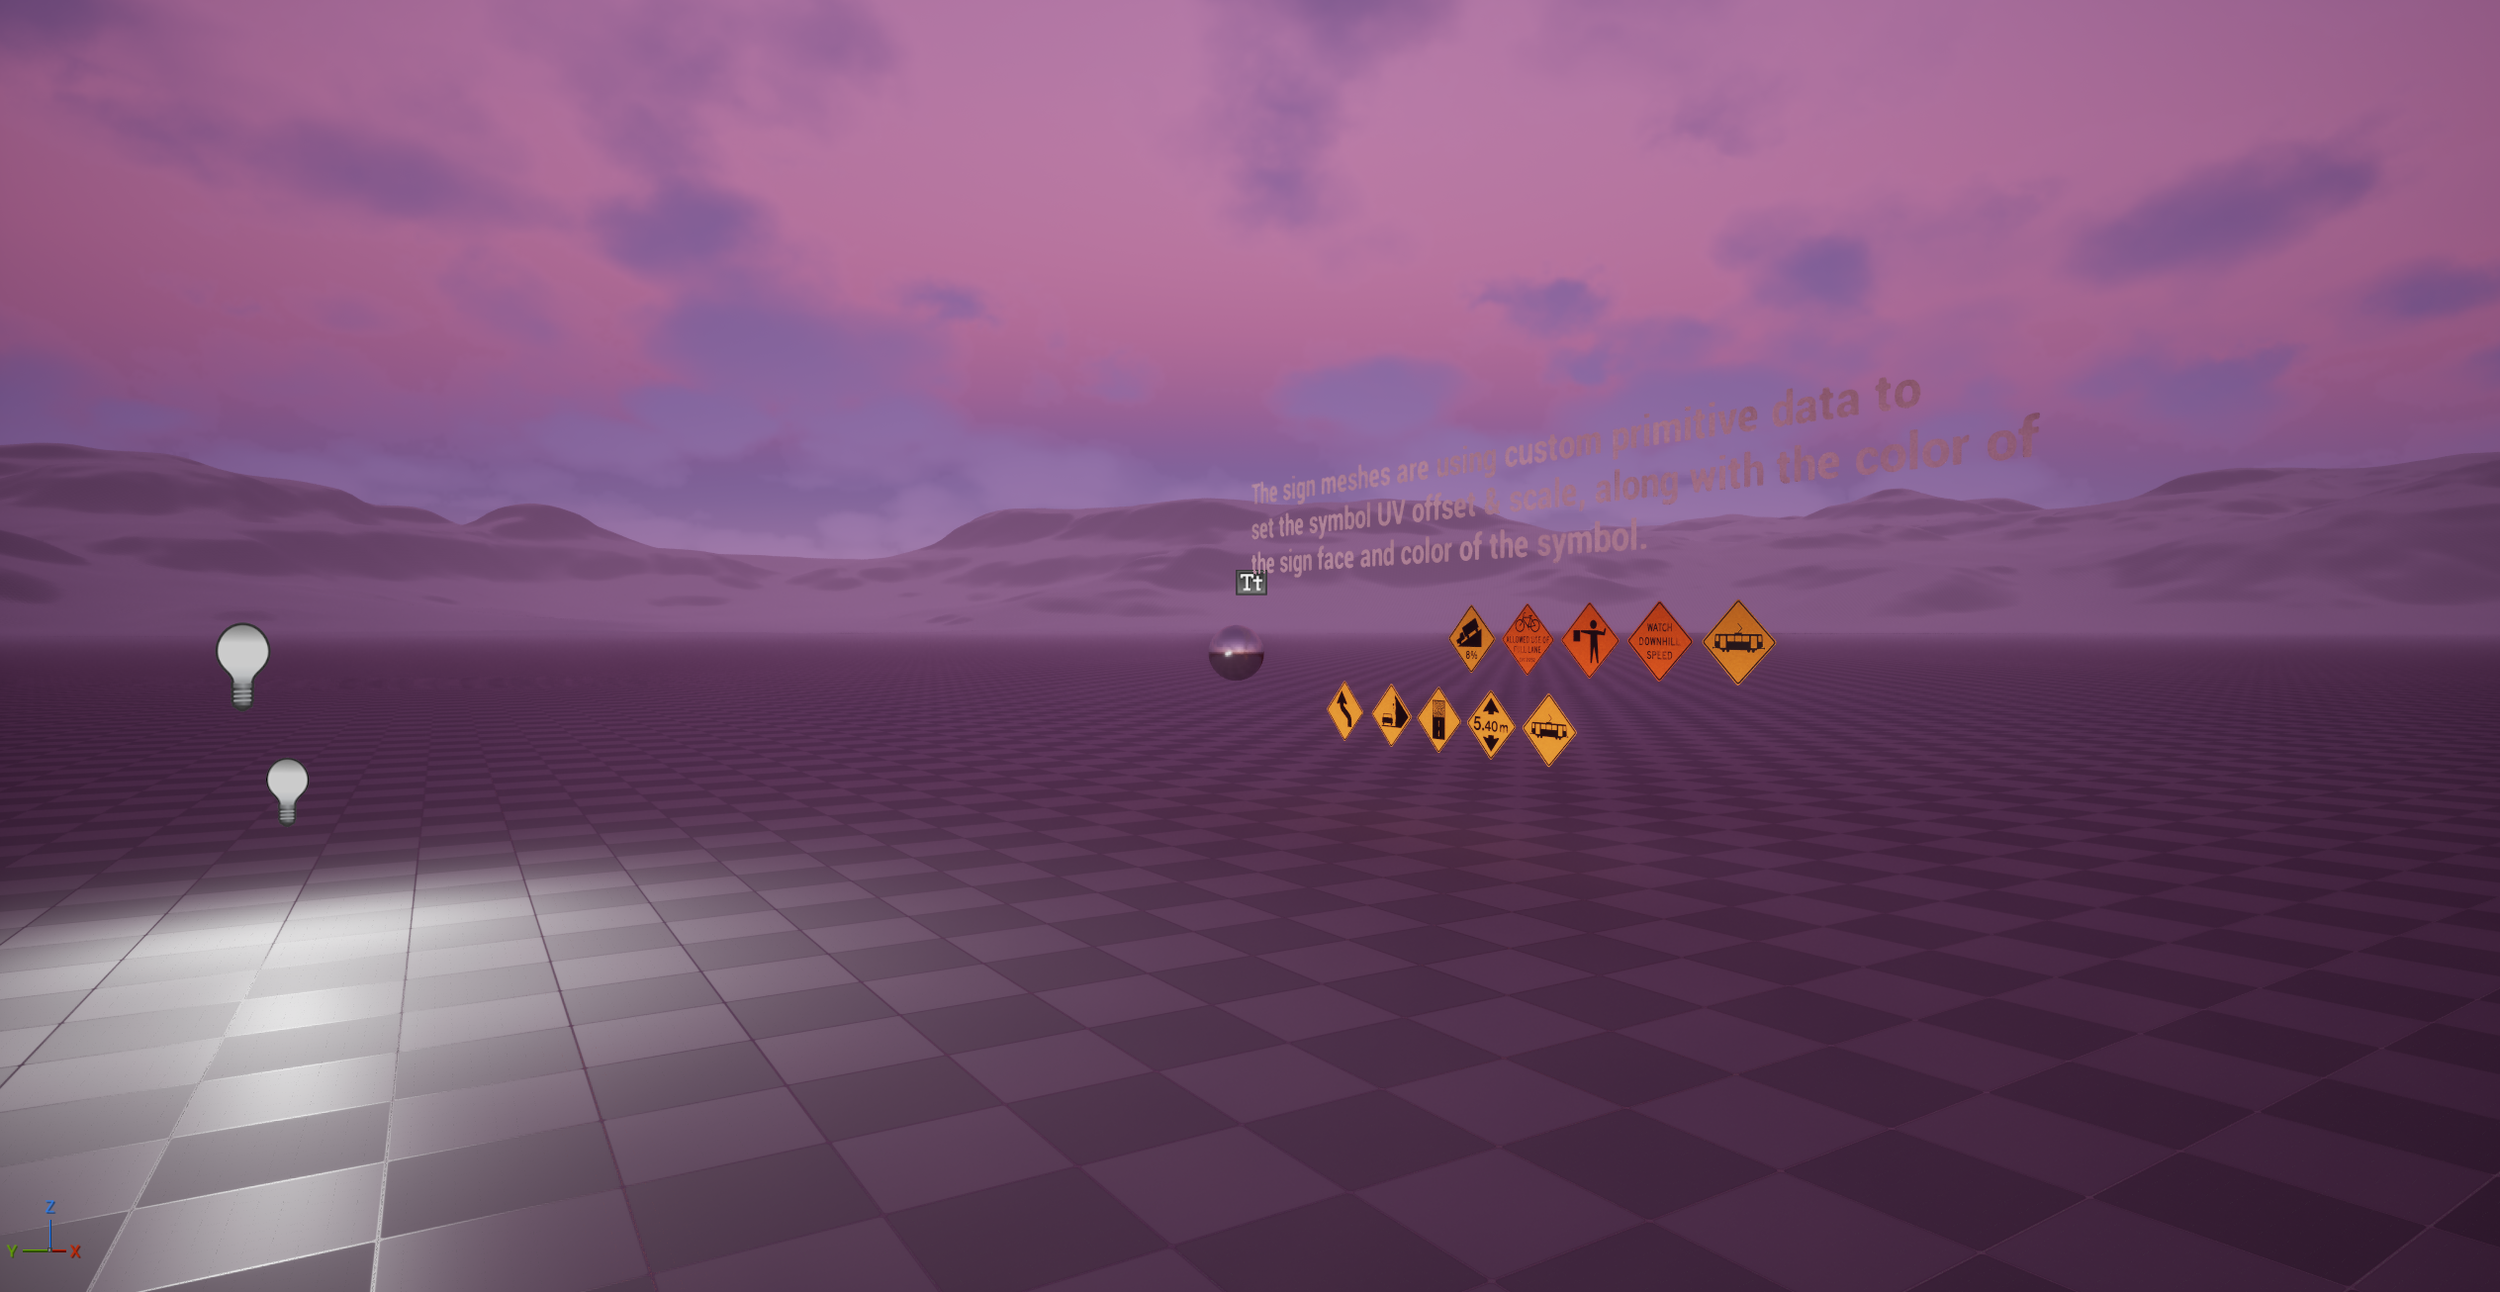
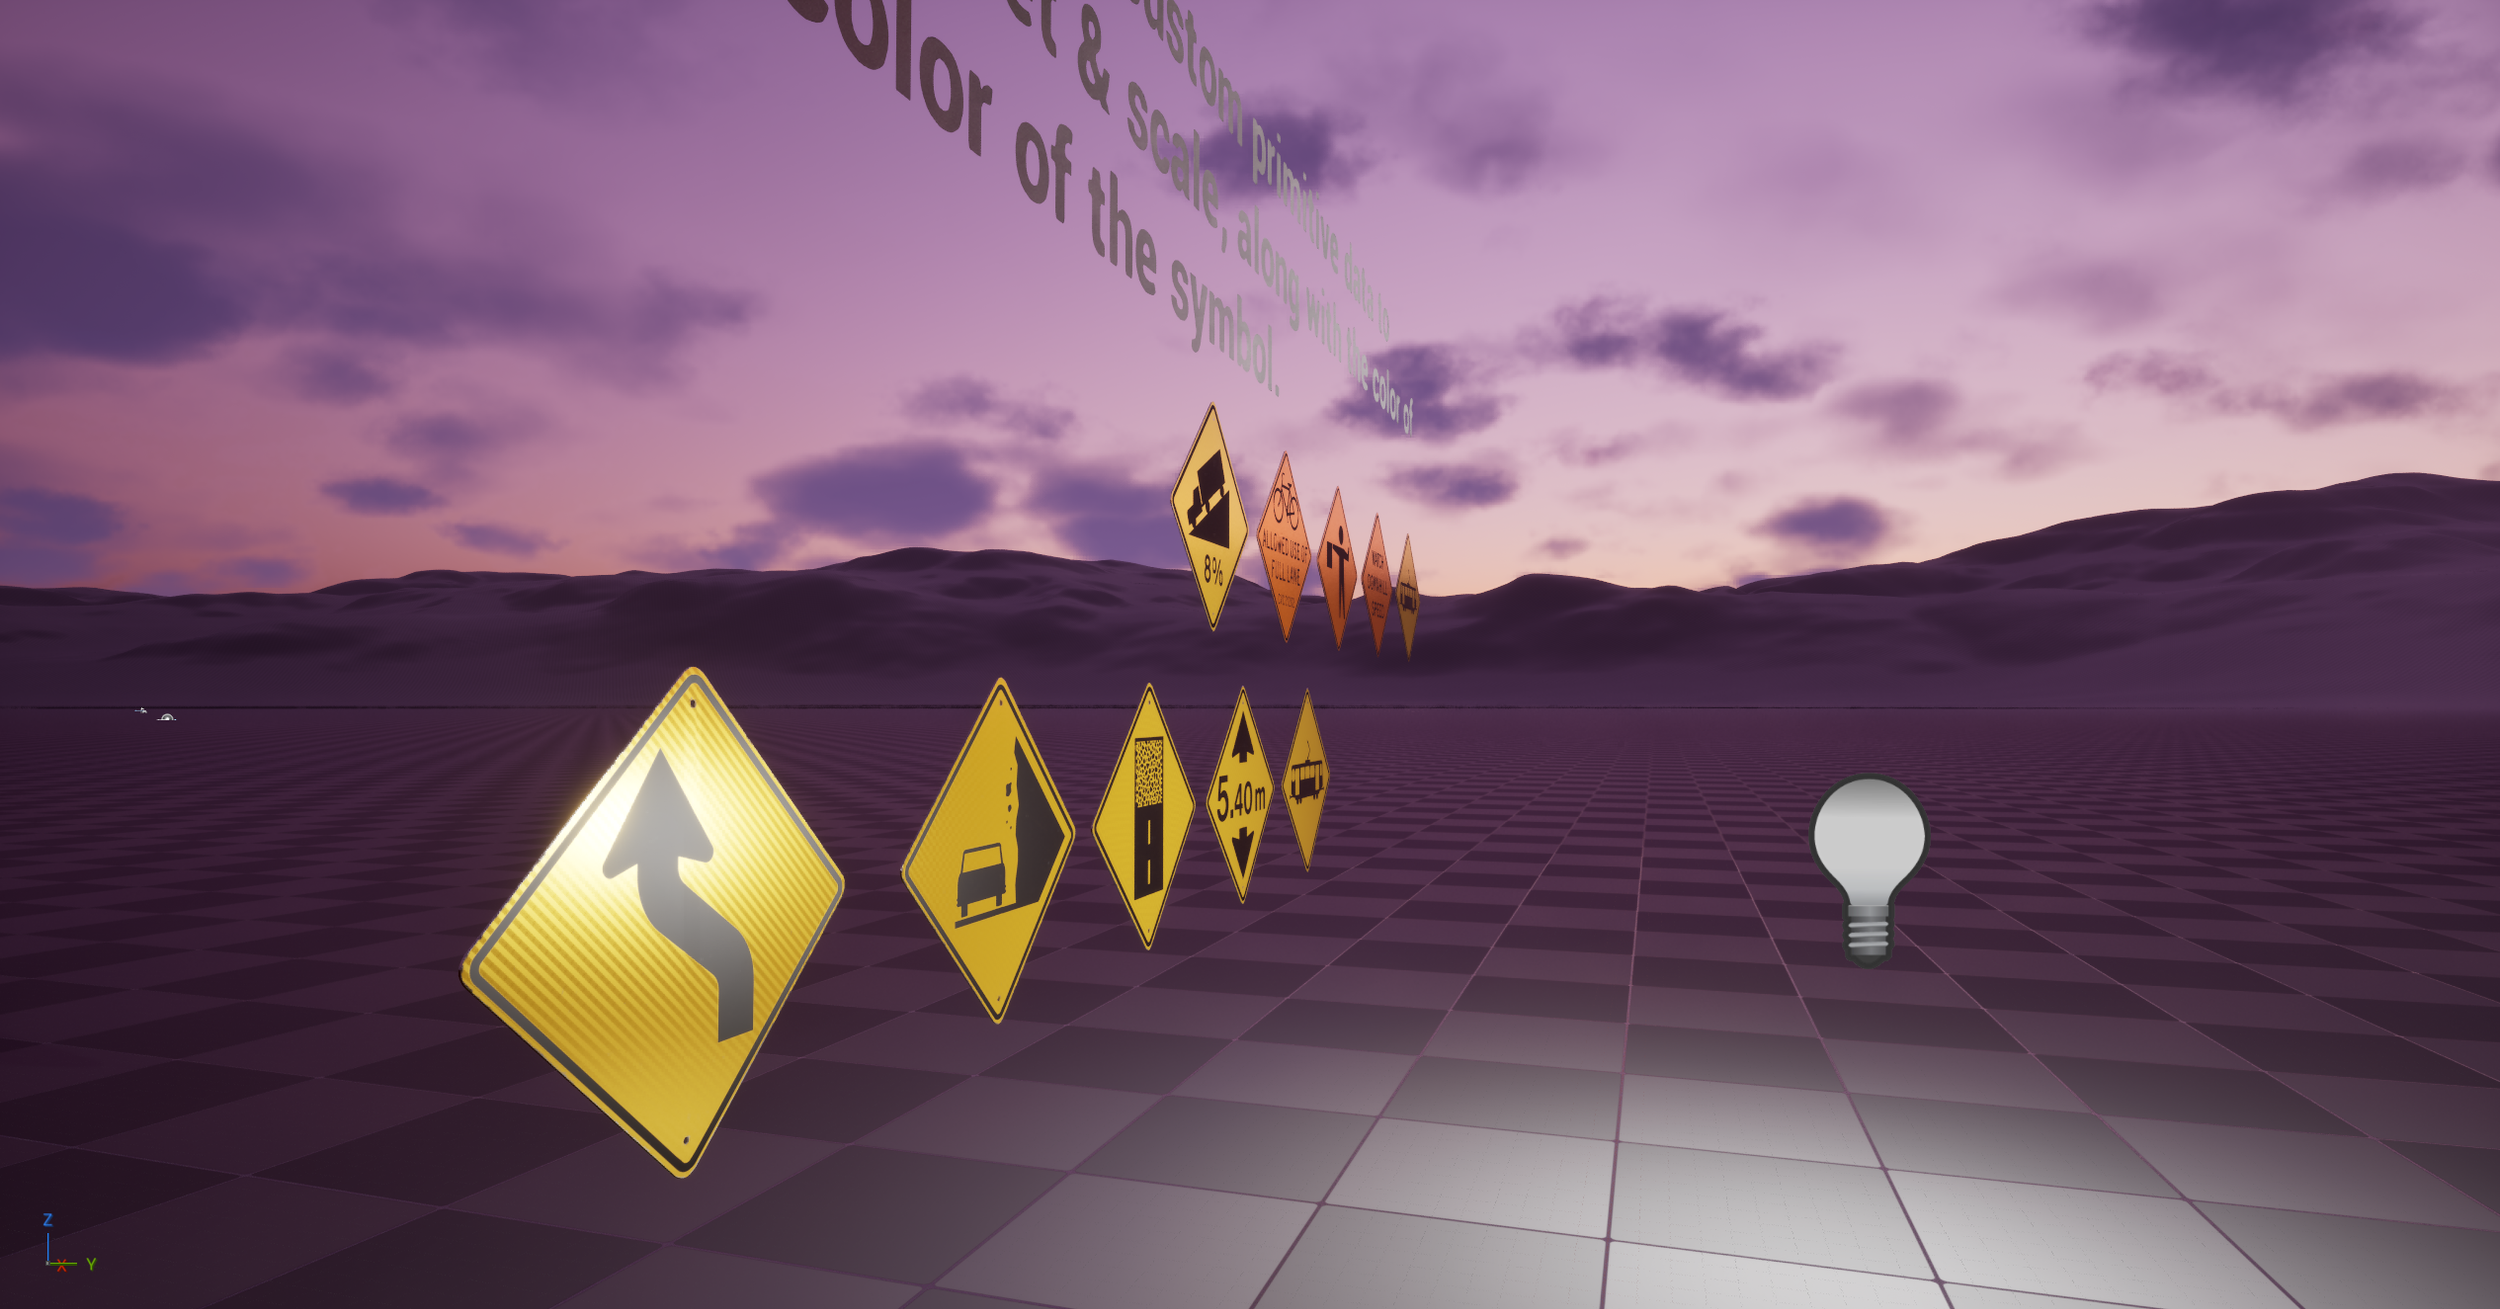
Below we can see 3 screenshots showing the retroreflection and standard specular reflection based on the viewing angle from the light source.
From left-to-right: Viewing angle behind light source (Retroreflection), viewing angle 35 degrees offset from light source (diffuse reflection), viewing angle 80 degrees offset from light source (standard specular reflection)


The base inputs for the retroreflection shading model.

All of this can be found on my retroreflection GitHub repository linked below. I have a few git patch files up for different versions of Unreal Engine 4, and Unreal Engine 5.

Material Only Retroreflection Solution
Once I completed the retroreflection material shading model, I wanted to create something that could be used in a simple material function, with no engine edits required. First I looked at creating a custom shader file solution that could be loaded into the material using a custom node, but I did not get very far with this. Eventually I settled on a very simple, yet elegant solution — I could transform the camera vector from world space to tangent space, then plug that into the normal map output in the material. This puts the normal reflection smack in the middle when looking from a light source, almost exactly how a retroreflection should behave. There are some minor caveats, as this isn’t properly calculating the reflection, it’s more of an approximation, and it also breaks specular reflection at shallow angles away from light sources. To fix that, I got the dot product of the vertex normal and camera vector, multiplied it and plugged it into the alpha of a lerp. This way I could lerp between regular normal map input and the retroreflection normal output based on the viewing angle of the surface. Sadly, this breaks on round or heavily curved surfaces, but for simple things like road signs, it works great.
This can also be applied to a clear coat material, rather than having to lerp the normals with vertex normal dot camera vector. If we create a clear coat material, we can have the base layer roughness be our normal surface roughness, then plug the normal based retroreflection setup into the clear coat bottom normal. We can then lerp the clear coat output using our retroreflection mask if applicable to mask out any parts we don’t want to be retroreflective. This is a far more expensive solution however as it relies on enabling the clear coat bottom normal, which adds some cost to your materials.
Standard Normal Map Based Retroreflection Material Snippet
Clear Coat Normal Map Based Retroreflection Material Snippet
Combo Standard + Clear Coat Normal Map Based Retroreflection Material Snippet


